How To Install DiVinciPay?
Step 1
-
Select your DiVinciPay package and Sign Up. The $99 package provides a 3-day FREE trial.
-
Once you have purchased your DiVinciPay package, go to your DiVinciPay Dashboard.
-
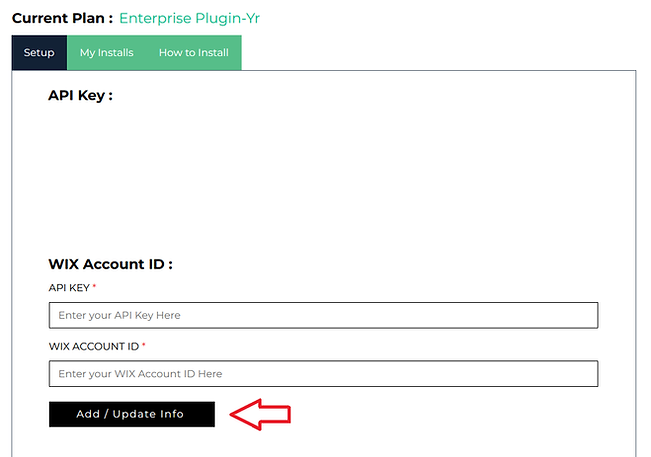
Now that you have arrived at the DiVinciPay Dashboard, you will see API KEY and WIX ACCOUNT ID and then below are two input fields where you will add the required credentials. To obtain these codes, please complete the following steps.
-
Create an API Key on the WIX API Keys Manager
-
Enter "DivinciPay" for the API Key Name and Tick the "All Permissions" checkbox and press on "Generate Key Button"
Depending on your security settings, you may be required to input a security code that will be emailed to the email address associated with your WIX Account each time you add a new API feature.


Download Instructions
-
Copy the API KEY and the ACCOUNT ID and input them in the setup tab

Step 2
-
Once the API KEY and the WIX ACCOUNT ID have been added to the DiVinciPay Dashboard form fields, select the ADD/UPDATE INFO button to lock into your profile.
Step 3
-
Now that the API KEY and the WIX ACCOUNT ID have been incorporated into your DiVinciPay profile, you will need to select the site that you want to add the DiVinciPay plugin to, on your existing payment platform (WIX, SQUARE, STRIPE). Do this by pressing the FETCH MY WEBSITES button

-
We use the Crypto Stellar DEMO website as our example, in the video tutorial, and will use it here, as well.
Select the CHOOSE WEBSITE button to continue

-
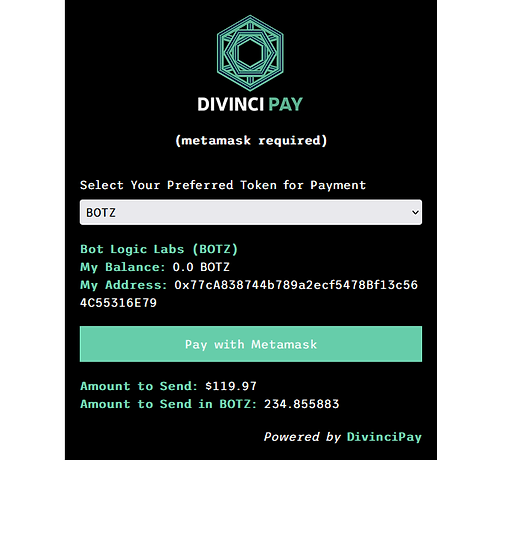
Once you select the CHOOSE WEBSITE, you will return to your DiVinciPay Dashboard. Next you will need to provide your MetaMask wallet and select which ERC-20 tokens you would like to accept in your WIX store. If you don't have a MetaMask wallet set up, select the MetaMask Fox to set one up. This should take less than one minute.


-
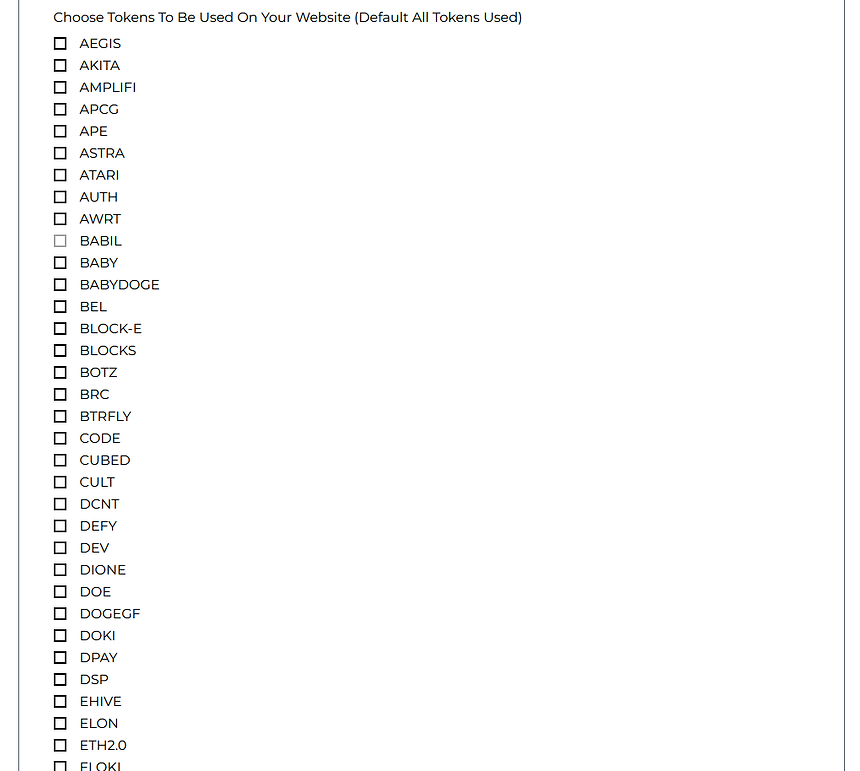
Once you input your MetaMask wallet address, you will need to select which ERC-20 tokens you are going to accept in your WIX store. This list can be modified at anytime in your DiVinciPay Dashboard. If you do not select a specific token, DiVinciPay will add all available tokens by default. Currently there are 160 tokens listed with over 8,000 available.
-
Now that you have selected the tokens you wish to accept, or have let DiVinciPay auto-populate the token list, you will need to generate the DiVinciPay Custom Code. To begin, select the GENERATE CODE button.

-
Once you select the GENERATE CODE button, you will see the code auto-populate in the box below. Select the COPY CODE button (#1) and then select PROCEED TO WIX CUSTOM CODE PAGE (#2)

-
Once you select PROCEED TO WIX CUSTOM CODE PAGE (#2) the custom code page will automatically open. Please select the ADD CUSTOM CODE button to paste the code.

-
Now that you have selected the ADD CUSTOM CODE, a box will open. Go to the box that says PASTE THE CODE SNIPPET HERE: and click anywhere in the box, press CTRL V, then click APPLY, and lastly, close out of that screen. Scroll back to the top toolbar and open your DiVinciPay Dashboard and select MY INSTALLS to confirm your DiVinciPay installation has been added to your site.

-
Congratulations!!!! Now DiVinciPay is added to your WIX store and you can immediately begin to accept ERC-20 tokens as payment for your goods and services.